For this course we will all use the same software, namely Python, Git, and Visual Studio Code, so that we all have nearly the same experience, regardless of platform (Windows, macOS, Linux). We will also create a workspace on our computers for storing work, Python dependencies, software preferences, etc.; test out the creation of a virtual environment; and make sure it all works.
Python
For running the code we write, we will need a Python interpreter. This is perhaps the most challenging to set up because each platform does it differently. Make sure you get Python version 3.6 or higher (3.8.5 is the highest stable version as of this writing).
Windows
The recommended way is to get the latest version from https://www.python.org: python-3.8.5-amd64.exe
During install, you should select “Add Python 3.8 to PATH”. If you do not, then later in the terminal you may need to use py instead of python or python3. That is, if these don’t work:
Try this instead (and let me know if this doesn’t work, either):
Whichever command returns you a version greater than or equal to 3.6 will be what you can use for this course.
See here for more information.
macOS
macOS machines come with Python 2.7, but this is an old and unsupported version that will not work for our class. The best way to install Python 3 is probably with Homebrew. First, start the Terminal app, and type the following at the prompt:
This command will download the installer for Homebrew and then run it. Once it’s installed, run the following command in your terminal:
Some more information about installing Python with Homebrew is here.
Linux
Python 3 generally comes pre-installed on Linux. In a terminal, you can check the latest version of Python like this:
If it says “command ‘python3’ not found” or gives you a version lower than 3.6, you need to install a newer version. How this is done depends on the distribution of Linux, so contact me if you need help.
On some distributions, notably Ubuntu, you may need to install support for venv, which we use for creating virtual environments (described below). Here’s how you’d do that for Ubuntu:
Git
For tracking versions of the code we write, we will use Git. This is also how we will submit our homework assignments. Installation is straightforward but there are many options. Choose the default for all except for the editor, which may say “vim”. Choose “Visual Studio Code” instead.
Windows
Download the latest version from https://git-scm.com: Git-2.28.0-64-bit.exe
macOS
Use Homebrew to install Git on macOS:
Linux
Install with your package manager. Git’s website has instructions for many distributions: https://git-scm.com/download/linux
Visual Studio Code
Visual Studio Code is the program we use to write code. It also assists with running tests and tracking changes with Git, as well as other advanced features for developers.
For all platforms you can download an installer from https://code.visualstudio.com/.
| Windows | Download |
| macOS | Download |
| Linux | Download (.deb) |
On macOS you can also use Homebrew, if you prefer:
Recommended Extensions
Visual Studio Code is quite capable on its own, but there are extensions that can make it even more useful for certain uses. I suggest only installing extensions from reputable sources, or those with many users and high ratings, as there’s the possibility of malicious extensions. I recommend the following for now:
- Python by Microsoft
- Git History by Don Jayamanne
Visual Studio Code may prompt you to install a “linter” for Python. This is optional, but it’s probably a good idea. It will let you know when you’ve made some kinds of programming mistakes.
Workspace
Now that the software is installed, we need a place to work in. This workspace is a folder (directory) somewhere on your computer (e.g., on the Desktop or whatever makes sense to you). Create it in whatever method you like (e.g., in Windows Explorer or Finder or in a terminal). For these instructions I will assume you named it “HG2051”.
Once it is created, open Visual Studio Code and open the folder you just created via File > Open Folder. You will see something like this:
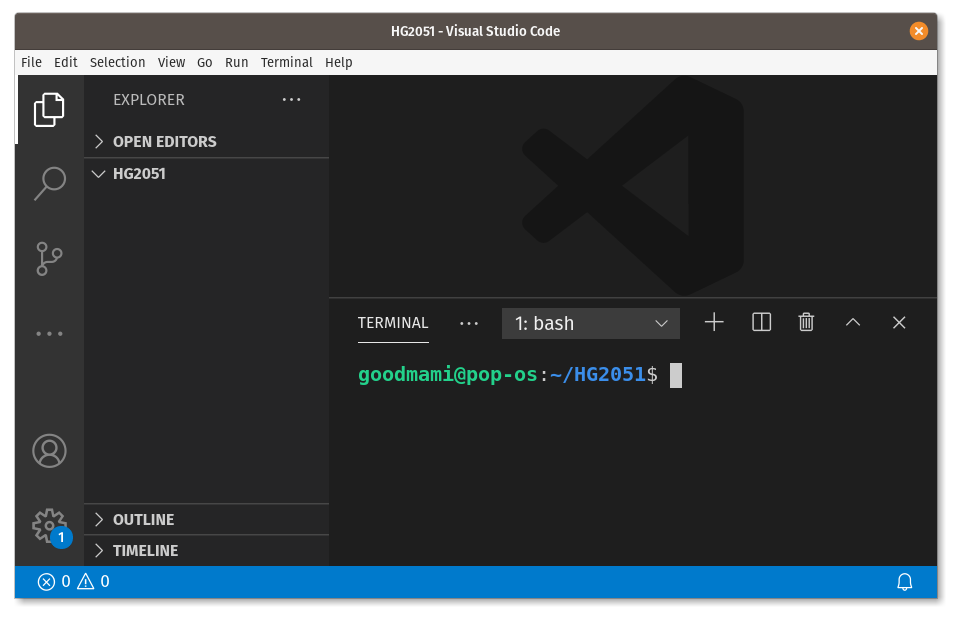
Note the “Explorer” side bar (top-left), which is a file and folder view. It shows that you are in the “HG2051” folder. In the terminal panel (bottom-right), the prompt indicates the same thing, i.e., that you are in the “HG2051” folder. If you don’t see the terminal, try pressing Ctrl-`, or use the menu View > Terminal. Note that your prompt may look a bit different, depending on which shell and platform you’re using.
Virtual Environment
The next step here is to create a virtual environment, which is a subfolder that contains the Python packages we will use for this course. While in principle we could use one virtual environment for the whole course, in practice it’s easier to make one for each assignment.
Creating the Virtual Environment
Enter the following command into Visual Studio Code’s terminal (you may need to replace python3 with py on Windows):
This calls the Python module venv, which creates virtual environments, and has it create one called “env” (you can name it whatever you like, but let’s stick with “env”). If successful, it will look like the following. If it did not succeed, please contact me.
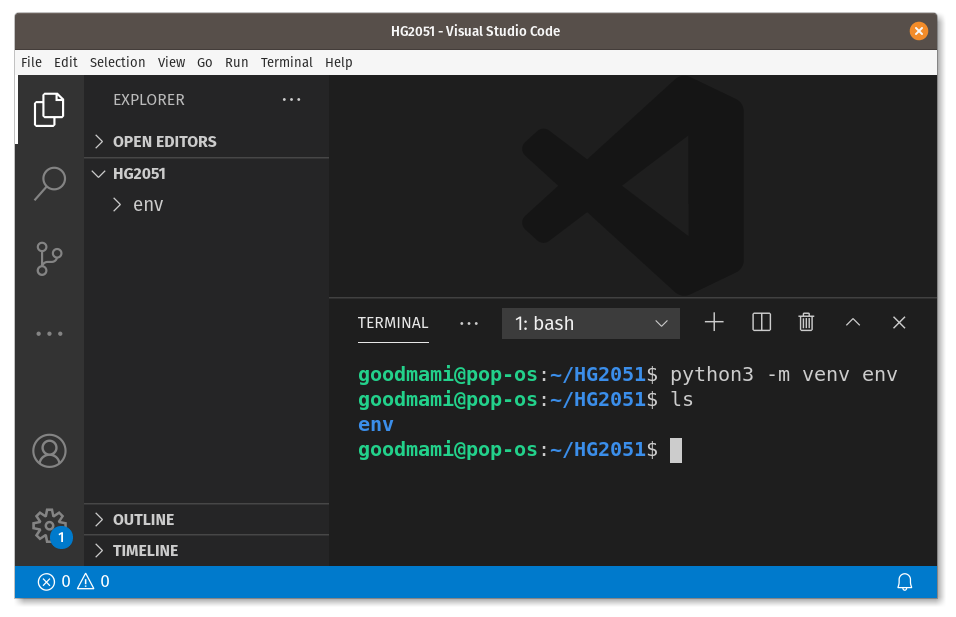
Now notice in the Explorer side bar that the “env” folder is created. In the terminal, I also executed the ls command, which lists the contents of the current folder, showing that the “env” folder exists. You don’t need to worry about the contents of the “env” directory except for the following:
- Activation script
- (Windows) –
env/Scripts/Activate.ps1 - (macOS/Linux) –
env/bin/activate
- (Windows) –
- Python interpreter
- (Windows) –
env/Scripts/python.exe - (macOS/Linux) –
env/bin/python
- (Windows) –
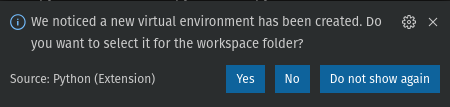
If you see a pop-up like the following (perhaps when editing a Python file), click “Yes” as it will help Visual Studio Code automatically run Python code using your virtual environment:
You may get an error on Windows, though. For this, see below.
If you don’t see that, try opening the command palette and searching for “Python: Select Interpreter”. You should see an option for ./env/bin/python (macOS/Linux) or .\env\Scripts\python.exe (Windows). If not, enter or find the path appropriate for your platform.
Activating the Virtual Environment
Creating the virtual environment just makes a new folder and directories, but to use it you must activate it. An activated virtual environment directs Python to use the packages within the folder and not those installed elsewhere on your computer. Users on macOS or Linux can simply run the following command (and let me know if it doesn’t work):
Windows users may have more work to do, because Windows by default blocks you from running “untrusted” scripts. To allow the current session to activate the virtual environment, you can change Visual Studio Code’s settings so PowerShell can run these scripts. Open the settings by typing Ctrl-, or use the menu File > Preferences > Settings, then search for the following setting:
terminal.integrated.shellArgs.windows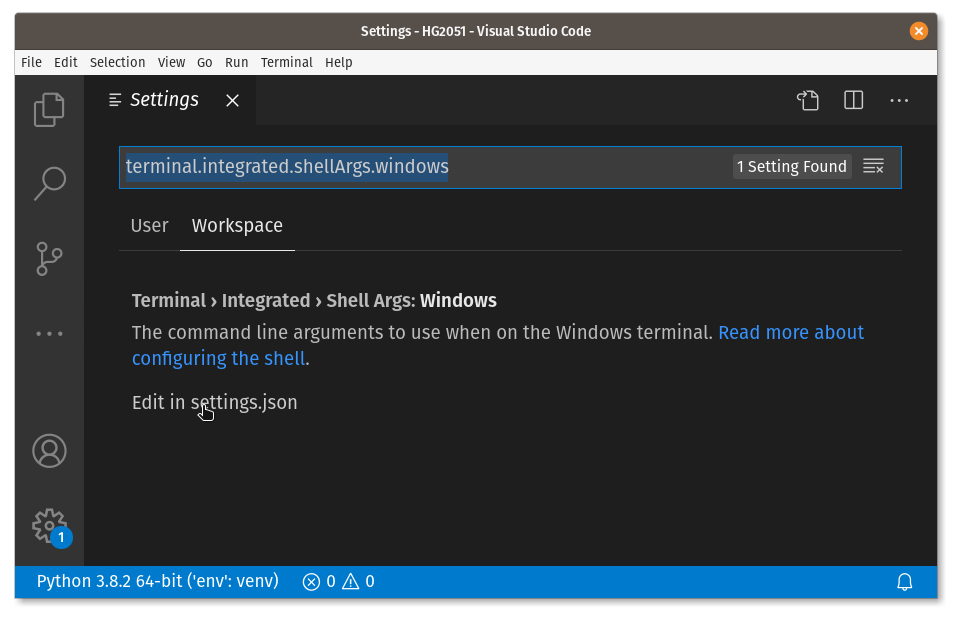
First select “User” so the change affects all your workspaces and not just the current folder. Then click on “Edit in settings.json” and change the value from the default of null to "-ExecutionPolicy ByPass":

Save the settings file and close. Since this is a setting that applies when a terminal is started and not one that is running, you will need to close the terminal (click the garbage bin icon), then start a new terminal. If that doesn’t work, try restarting Visual Studio Code. Now, in the new terminal, try to execute the following:
If successful, you’ll see (env) at the beginning of the next prompt. If you see any errors, please let me know. While the environment is active, using python (instead of python3 or py) should use the Python version included in the virtual environment.
Thanks to the following Stack Overflow answer: https://stackoverflow.com/a/61281420/1441112
Test It Out
If all was successful, you should be able to do the following two things.
Install the pytest Dependency
We will use pytest for automatic evaluation of our homework assignments. Once the virtual environment is active, run the following command:
If it says the pip command is not found, ensure your virtual environment is active. If it is and still cannot find it, then try pip3 or python -m pip instead. If it still complains after that, then please contact me.
If it is successful, you’ll see 10 or so packages be installed in addition to pytest. The others are pytest’s dependencies.
Create a hello.py Module
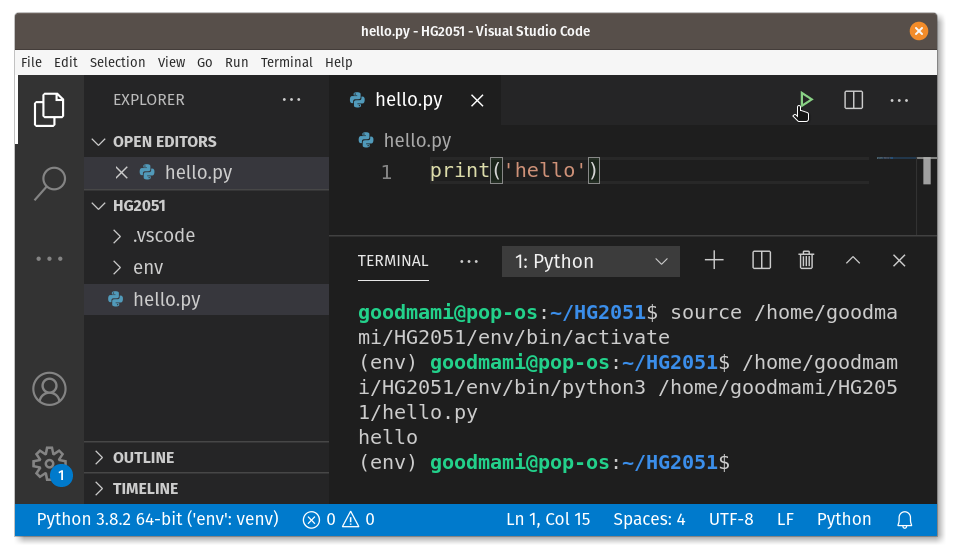
Create a new file in Visual Studio Code (Ctrl-n or File > New File). Type the following into the file:
Then save (Ctrl-s or File > Save) the file to hello.py in your current workspace. Once it is saved, you should see the code become colored (syntax-highlighting). This means that Visual Studio Code recognized it as a Python file. If Visual Studio Code also detected your virtual environment, you should see a green “play” icon in the top right. Clicking that will launch a new terminal with the virtual environment active (the shell type will say “Python” instead of “bash” or “PowerShell”) and execute the Python file. You should see “hello” in the terminal output of the command.